


Mini Split Installation in East Hampton, NY
Installing a ductless mini split in East Hampton, NY is a practical, energy-efficient solution for homes that need zoned comfort, retrofit cooling, or supplemental heating without major ductwork. Whether you own a year-round residence, a seasonal cottage near the bay, or a historic property in a village district, a properly planned mini split installation reduces humidity, improves comfort, and can lower operating costs compared with window units or window ACs. This page explains the full installation process, common local considerations, what to expect during the job, and how to prepare your home.
Why a mini split makes sense in East Hampton
- Coastal humidity and hot, humid summers make dehumidification and precise temperature control valuable.
- Many East Hampton homes are older or lack central ducts, so a ductless solution preserves architecture while adding modern comfort.
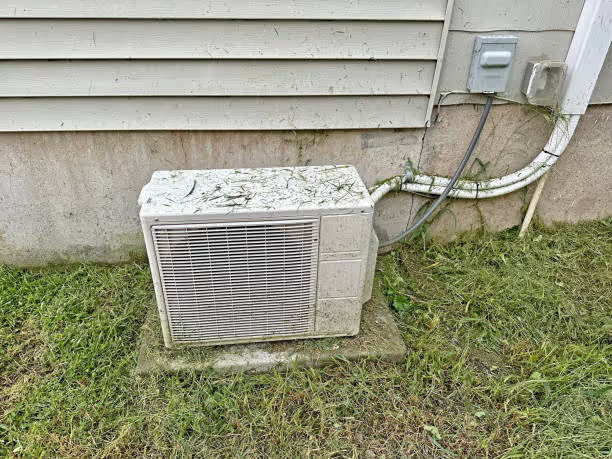
- Salt air can affect outdoor equipment, so placement and corrosion-resistant components matter.
- Seasonal occupancy patterns mean systems should handle long idle periods and still start reliably when needed.
Types of mini split systems and common use cases
- Single-zone wall-mounted systems for one room, guest suite, or home office.
- Multi-zone systems with one outdoor compressor and multiple indoor heads to heat and cool several rooms independently.
- Ceiling cassette or low-profile units for rooms where wall space or aesthetics are a concern.
- Heat pump mini splits for year-round heating and cooling in milder winters or as a supplement to existing heating systems.
Site survey and load calculation
A professional installation begins with a site survey and load calculation to size the system correctly.
- Manual J load calculation: evaluates square footage, insulation levels, window type and orientation, occupancy, and local design temperatures to determine capacity needs.
- Room-by-room assessment: identifies where zones will be best served, potential obstruction to airflow, and mounting options.
- Structural and aesthetic review: assesses wall construction, available outdoor unit pad locations, roof or ground mounting, and any historic district restrictions.
Selecting indoor and outdoor unit types and locations
- Indoor unit selection: wall-mounted, floor-mounted, ceiling cassette, or slim ducted. Choose type based on room layout, ceiling height, and noise preferences.
- Outdoor unit placement: choose a location with good airflow, minimal direct salt spray, and compliant with local setback and noise rules. Elevate the unit if coastal flooding or snow drift is a concern.
- Line set routing: plan the shortest, most direct path through exterior walls to minimize refrigerant line length and impact to finishes.
- Aesthetics and noise: consider condenser pad pads with sound-absorbing mounts and position outdoor units away from bedrooms and neighbor sight lines.
Electrical and refrigerant line requirements
- Electrical: mini splits require a dedicated circuit and properly sized disconnect per manufacturer specifications. Older East Hampton homes may need an electrical panel upgrade.
- Conduit and wiring: run power from panel to outdoor unit; indoor units often require low-voltage communication wiring back to the outdoor unit.
- Refrigerant lines: professionally brazed copper line sets must be properly insulated and sloped for drainage. Line length and elevation affect required refrigerant charge.
- Pressure testing and evacuation: systems are pressure-tested, evacuated with a vacuum pump, and charged according to manufacturer procedures. Only certified technicians should handle refrigerant.
Permits and local regulations
- Permits are commonly required for new HVAC equipment; check with the Town of East Hampton Building Department for permit types and submission requirements.
- Historic districts or coastal overlay zones may have additional review or placement restrictions. Verify local zoning and any homeowner association rules before finalizing outdoor unit location.
- Inspections: installations typically require a final mechanical and/or electrical inspection to close the permit.
Typical installation timeline
- Site survey and quote: 1 to 2 hours on-site.
- Permit approval: can range from a few days to several weeks depending on workload and local reviews.
- Installation day(s):
- Single-zone installs: usually completed in 4 to 8 hours.
- Multi-zone systems or complex line runs: 1 to 3 days depending on number of indoor heads and electrical work.
- Electrical upgrades or structural work can extend the schedule.
- Commissioning and final inspection: 1 to 2 hours for testing and paperwork once installation is complete.
Commissioning and performance testing
- System start-up: verify power, controls, and communication between indoor and outdoor units.
- Refrigerant check: measure pressures and temperatures to confirm correct charge and system operation.
- Electrical checks: measure current draw, verify proper breaker sizing and grounding.
- Performance testing: confirm temperature split, airflow, dehumidification function, and remote control programming.
- Documentation: final voltages, amp draws, refrigerant data, and warranty registrations are recorded.
Aftercare, maintenance, and warranty
- Manufacturer warranty: most mini splits include a parts warranty and sometimes warranty for compressor; confirm terms for labor and components.
- Workmanship warranty: installers often provide a limited labor warranty; verify length and coverage.
- Recommended maintenance:
- Clean or replace indoor filters every 1 to 3 months depending on usage.
- Annual technician tune-up: inspect refrigerant charge, electrical connections, condensate drain, and fan motors.
- Rinse outdoor condenser fins gently each spring to remove salt build-up and debris near the coast.
- Long-term care: schedule preventive maintenance before summer and after winter to ensure reliable seasonal startups.
Tips for preparing your East Hampton home
- Clear access: provide clear paths to installation areas, both inside and outside. Move furniture or wall hangings near the planned indoor head location.
- Power access: ensure access to the electrical panel and a clear breaker for new connections.
- Protect finishes: cover furniture and flooring near work areas; professional installers use drop cloths and walk-off mats.
- Pets and occupants: arrange for pets and occupants to be in a safe area while work is underway.
- Consider timing: avoid scheduling during peak summer weekends in East Hampton when permit offices and installer schedules are busiest.
Final considerations
A correctly installed mini split in East Hampton provides quiet, zoned comfort, superior humidity control, and efficient heating and cooling without ductwork. Proper site planning, adherence to local permitting, corrosion-conscious outdoor placement, and annual maintenance will extend system life and performance. Having your system sized by a qualified technician and commissioned to manufacturer standards ensures reliable operation tailored to your home and the coastal climate.
Customer Testimonials
Hear directly from homeowners who trust Bobby O’s HVAC Inc. for fast response times, honest service, and lasting comfort.

I got 3 estimates for the job but only Bobby O’s knew about rebates etc. the workmanship was outstanding and Armond really knows his stuff and is a true craftsman, something that is in short supply these days.

Competitive pricing. Nice, easy, and clean installation. No problems for a long time. When there was a hiccup, the problem immediately. Highly recommend.
Our AC stopped working in the middle of the heat wave. Called the company and they were able to get a tech out the same day to get us up and running. Great service!!
Quality professional service in a timely manner. Highly experienced in the industry. Great troubleshooting skills
I’ve had a service contract with Bobby O’s for about 6 years. They are always responsive, professional and thorough.
Compressor stopped working as I am on a service plan response was same day
and all was made right
My bedrooms had no AC!
They came and quickly evaluated the problem, replaced the bad part and I soon had complete cool AC everywhere.
Rate was very reasonable!
This was a fabulous experience. Most people don't even return your call. Bobby returned call right away, and at my house the next day!!
Fixed the issue!!! And on top of it gave me a great price!!! I totally recommend him!!!
Bobby is great! He was extremely helpful and accommodating to get my heat back running again at a reasonable price. Highly recommend
I was referred to Bobby O's HVAC through a friend. They came the very next morning, assessed the problem. I chose to replace rather than repair. They were fair, efficient, neat, extremely professional and fast!


