


Mini Split Installation in Coram, NY
Adding a ductless mini split to your Coram, NY home is a practical, efficient way to control temperature zone by zone—especially given Long Island summers that bring high humidity and variable winters that still require reliable heating. This page walks through the complete mini split installation workflow so you know exactly what to expect: initial site survey and load calculation, unit and indoor head placement, line set and electrical needs, permitting and code compliance, professional installation steps, commissioning and performance testing, warranty and maintenance recommendations, and realistic timelines. The goal is to help you make an informed decision and avoid common pitfalls of mini split installation in Coram, NY.
Why a mini split makes sense in Coram, NY
- Zoned comfort for individual rooms, ideal for older Long Island homes with limited or no ductwork.
- High seasonal efficiency reduces energy use during humid summers and shoulder seasons.
- Flexible indoor head options fit various room layouts in Coram’s mix of ranches, colonials, and newer construction.
- Minimal disruption during retrofit installations compared with full duct systems.
Initial site survey and precise load calculationA thorough site survey is the foundation of a reliable installation. During the survey a qualified technician will:
- Inspect room dimensions, ceiling heights, insulation levels, window types and orientation, and occupancy patterns.
- Note existing heating systems, available electrical service, and potential outdoor unit locations.
- Perform a Manual J load calculation to determine cooling and heating loads for each zone.
- Recommend single-zone versus multi-zone configurations based on usage and budget.
Accurate load calculation prevents common issues like short cycling, underperforming units, and excessive energy use. In Coram, pay special attention to south- and west-facing rooms that gain heat in summer and older windows that increase load.
Unit and indoor head placement optionsChoosing the right indoor head type and location affects comfort and aesthetics. Typical options include:
- Wall-mounted heads: Most common for bedrooms and living rooms; compact and efficient.
- Ceiling cassette heads: Centralized airflow for larger rooms or open plans; requires a suspended ceiling or soffit.
- Floor console heads: Useful for rooms with low wall clearance or where occupants prefer low-level airflow.
- Multi-split setups: One outdoor unit can serve multiple indoor heads for whole-house zoning.
Placement considerations: avoid blocking airflow with furniture, keep heads at recommended mounting heights, and plan refrigerant line wall penetrations to minimize visual impact.
Line set and electrical requirementsCorrect line set and electrical work are critical for safety and performance.
- Refrigerant line length and elevation change influence system sizing; manufacturers publish maximums that must be followed.
- Line sets must be insulated, properly brazed, pressure tested, and vacuumed to remove moisture before charging.
- A dedicated electrical circuit and correctly sized breaker are usually required; outdoor disconnects and surge protection may be needed.
- Drain routing for condensate must slope properly and may require a condensate pump for interior locations.
Improper line insulation or undersized electrical service are frequent causes of performance problems in humid climates like Coram.
Permitting and code compliance in Coram, NYLocal permits and inspections are typically required for mini split installations in Suffolk County and Coram. Typical steps:
- Submit electrical permit and mechanical or HVAC permit documents to the local building department.
- Ensure installations meet National Electrical Code, local zoning, and refrigerant handling regulations.
- Licensed technicians must follow state requirements for refrigerant handling certification and disposal.
- Coordinate inspections for electrical work and final system approval.
Handling permitting upfront avoids delays and ensures your installation is compliant and insurable.
Professional installation steps (what happens on install day)A standard professional installation generally follows this sequence:
- Final pre-install verification and layout confirmation for indoor heads and outdoor unit.
- Mount indoor heads and cut minimal wall penetrations for line sets and condensate piping.
- Run, braze, pressure test, and evacuate refrigerant lines to required vacuum levels.
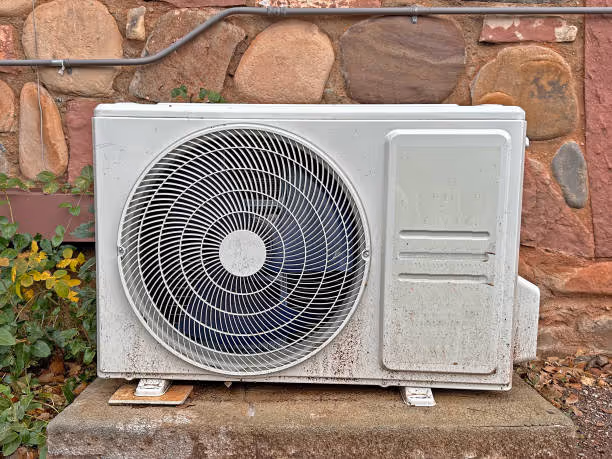
- Install outdoor condenser, set on a level pad or brackets, and make electrical connections.
- Power up low-voltage controls, connect thermostats or remotes, and perform an initial charge per manufacturer specs.
- Route and secure drain lines and insulate all refrigerant piping.
- Clean the work area and document installation details for warranty.
Commissioning and performance testingProper commissioning confirms the system meets design expectations:
- Verify refrigerant charge by measuring superheat or subcooling per manufacturer guidance.
- Confirm airflow and temperature split across the evaporator coil.
- Test electrical currents, voltages, and proper operation of safety devices.
- Run the system in cooling and heating modes to validate responsiveness and zone control.
- Check condensate flow and confirm no leaks in line sets or indoor units.
Technicians should provide a commissioning report showing measured values and recommended adjustments.
Warranty, maintenance recommendations, and longevityManufacturer and labor warranties vary by brand and model. Important service and maintenance points:
- Keep manufacturer registration documents for warranty claims.
- Schedule annual maintenance: clean coils, verify refrigerant levels, inspect electrical connections, and service condensate drains.
- Replace or clean indoor filters monthly to maintain airflow and indoor air quality.
- Watch for signs of reduced performance such as uneven temperatures, unusual noises, or frequent cycling.
Routine maintenance preserves efficiency and extends equipment life, particularly in a humid coastal-influenced climate like Coram.
Common mini split installation issues in Coram, NY — and how they are prevented
- Undersizing or oversizing units: Prevent with accurate Manual J load calculations.
- Poor indoor head placement: Avoid drafts, dead zones, and blocked airflow by following placement best practices.
- Refrigerant leaks and improper charging: Ensure certified technicians perform brazing, pressure testing, and evacuation.
- Inadequate condensate routing: Design proper piping or install pumps where necessary to prevent indoor water damage.
- Electrical defects: Use correctly sized circuits and qualified electricians to prevent tripping and hazards.
Timelines for typical installations
- Site survey and load calculation: 1 to 2 hours for a single-family home.
- Permitting and approvals: Variable; local review may take days to a few weeks depending on workload.
- Single-zone installation: Often completed in one working day.
- Multi-zone installations: Typically 1 to 3 days depending on the number of heads and site complexity.
- Commissioning and final inspection: Usually same day as installation or within a few days.
Final considerationsMini split systems deliver flexible, efficient heating and cooling for Coram, NY homes, especially where ducts are impractical or zoning is desired. The keys to long-term satisfaction are accurate load calculations, proper equipment selection, professional installation that follows local codes, thorough commissioning, and regular maintenance. Understanding each step of the workflow helps you avoid common problems and ensures reliable, comfortable indoor conditions year round.
Customer Testimonials
Hear directly from homeowners who trust Bobby O’s HVAC Inc. for fast response times, honest service, and lasting comfort.

I got 3 estimates for the job but only Bobby O’s knew about rebates etc. the workmanship was outstanding and Armond really knows his stuff and is a true craftsman, something that is in short supply these days.

Competitive pricing. Nice, easy, and clean installation. No problems for a long time. When there was a hiccup, the problem immediately. Highly recommend.
Our AC stopped working in the middle of the heat wave. Called the company and they were able to get a tech out the same day to get us up and running. Great service!!
Quality professional service in a timely manner. Highly experienced in the industry. Great troubleshooting skills
I’ve had a service contract with Bobby O’s for about 6 years. They are always responsive, professional and thorough.
Compressor stopped working as I am on a service plan response was same day
and all was made right
My bedrooms had no AC!
They came and quickly evaluated the problem, replaced the bad part and I soon had complete cool AC everywhere.
Rate was very reasonable!
This was a fabulous experience. Most people don't even return your call. Bobby returned call right away, and at my house the next day!!
Fixed the issue!!! And on top of it gave me a great price!!! I totally recommend him!!!
Bobby is great! He was extremely helpful and accommodating to get my heat back running again at a reasonable price. Highly recommend
I was referred to Bobby O's HVAC through a friend. They came the very next morning, assessed the problem. I chose to replace rather than repair. They were fair, efficient, neat, extremely professional and fast!


